Hey there fellow baking enthusiasts! If you’re anything like me, the mere mention of banana bread can send your taste buds into a frenzy. And let’s face it, there’s something utterly comforting about the aroma of freshly baked bread wafting through the kitchen.
But what if I told you that we’re about to take that classic banana bread recipe up a notch? That’s right, we’re diving into the world of Kitchenaid banana bread recipes! Picture this: ripe bananas, a hint of cinnamon, and a touch of vanilla, all coming together in perfect harmony thanks to the magic of your trusty Kitchenaid stand mixer.
Get ready to elevate your baking game and become the reigning champion of banana bread in your household. Let’s dive in and whip up some deliciousness together!
Kitchenaid Banana Bread
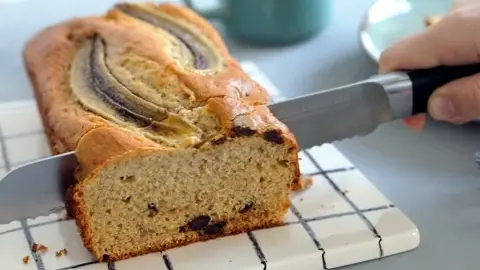
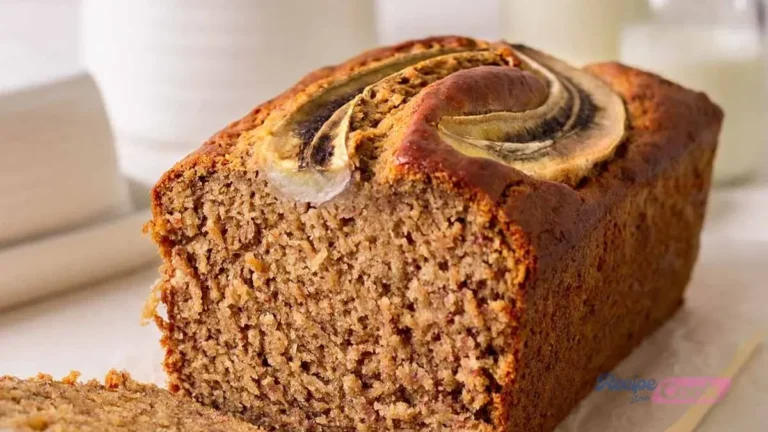
Indulge your senses with the exquisite aroma and flavor of KitchenAid Banana Bread. This timeless recipe, enhanced by the efficiency of a KitchenAid® stand mixer, promises a delightful blend of comfort and creativity.
Mashed bananas, seamlessly prepared with the flat beater accessory, form the heart of this moist and flavorful loaf. The incorporation of melted butter, eggs, and precisely sifted dry ingredients transforms the batter into a harmonious symphony of taste.
Customize your creation with optional mix-ins, from nuts to chocolate, and let your KitchenAid stand mixer elevate your baking experience. With a prep time of just 15 minutes and a total time of 75 minutes, this recipe ensures a swift journey from mixing bowl to indulgent delight.
Ingredients for Kitchenaid Banana Bread Recipe
- 3 ripe bananas
- ½ cup (1 stick) unsalted butter, melted
- 1 cup granulated sugar
- 2 large eggs
- 2 cups all-purpose flour
- 1 teaspoon baking soda
- ½ teaspoon salt
Optional Mix-Ins:
- ½ cup chopped nuts (e.g., walnuts or pecans)
- ½ cup dried fruit (e.g., raisins or cranberries)
- ½ cup chocolate chips
Preparation Time: 15 minutes
Cooking Time: 60 minutes
Total Time: 75 minutes
How to Make Kitchenaid Banana Bread Recipe
Step 1: Prepare Loaf Pan
Preheat oven, grease loaf pan, and ensure the oven is fully preheated.
Step 2: Mash Bananas
Using the KitchenAid® stand mixer with the flat beater, beat ripe bananas on speeds 2-4 until desired consistency.

Step 3: Combine Sugar, Eggs & Melted Butter
Add melted butter, mix until incorporated, then introduce eggs and sugar. Beat on medium speed until well combined.
Step 4: Add Dry Ingredients
Mix flour, baking soda, and salt separately. Slowly add to the stand mixer bowl, stirring until just combined.

Step 5: Add Mix-Ins
Incorporate desired mix-ins (nuts, fruit, chocolate) using a spatula. Avoid overmixing to prevent a dense loaf.
Step 6: Bake
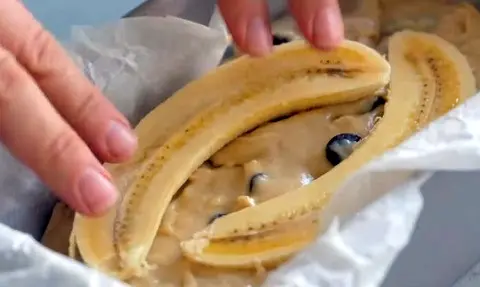
Pour batter into the prepared loaf pan and bake according to your recipe. Check for doneness with a toothpick.

Some Tasty Ways To Customize This Kitchenaid Banana Bread Recipe
1. Nutty Delight:
Customize your banana bread by incorporating a mix of chopped walnuts, pecans, and almonds into the batter. The combination of crunchy nuts will add a delightful texture to each bite.
2. Chocolate Chip Bliss:
Indulge your sweet tooth by folding in a generous amount of semi-sweet or dark chocolate chips. The melted chocolate pockets in the bread will create a decadent treat.
3. Tropical Twist:
Enhance the banana flavor by adding a tropical touch. Fold in shredded coconut and diced pineapple to transport your taste buds to a sun-kissed paradise.
4. Cinnamon Spice Infusion:
Elevate the warmth of your banana bread by incorporating a teaspoon of ground cinnamon into the batter. This subtle spice will add depth and complexity to the overall flavor.
5. Citrus Burst:
Brighten up your banana bread with a burst of citrusy freshness. Add a teaspoon of grated orange or lemon zest to the batter for a zesty twist.
6. Cream Cheese Swirl:
Create a delightful contrast by swirling in a layer of sweetened cream cheese into the banana bread batter before baking. The tangy creaminess will complement the sweetness of the bread.
7. Dried Fruit Medley:
Mix things up by adding a medley of dried fruits such as raisins, cranberries, and apricots. The chewy texture and concentrated sweetness will make each bite a delightful surprise.
8. Maple Glazed Elegance:
Elevate the presentation by drizzling a simple maple glaze over the cooled banana bread. The hint of maple sweetness will add a touch of elegance to your treat.
9. Sliced and Grilled:
Take your serving game to the next level by slicing the banana bread and grilling the slices lightly. The caramelized edges will add a smoky flavor that pairs perfectly with the moist bread.
10. Ice Cream Sandwiches:
Turn your banana bread into a decadent dessert by using slices as a base for ice cream sandwiches. Sandwich a scoop of your favorite ice cream between two slices for a cool and indulgent treat.
Some tips on This Kitchenaid Banana Bread Recipe
1. Ripe Bananas for Enhanced Flavor: Use ripe bananas with brown spots on the peel. They not only provide a natural sweetness but also intensify the banana flavor in your bread.
2. Precision with KitchenAid Stand Mixer: Adjust the speed of your KitchenAid Stand Mixer based on each step. Lower speeds are ideal for mashing bananas, while medium speeds work well for incorporating eggs and sugar.
3. Preheat the Oven Thoroughly: Ensure your oven is fully preheated before placing the banana bread inside. This helps achieve the perfect rise and texture while preventing potential issues like dryness.
4. Proper Greasing of the Loaf Pan: Thoroughly grease the loaf pan using shortening, cooking oil, or butter. This step ensures easy removal of the banana bread and prevents sticking.
5. Experiment with Mix-Ins: Elevate your banana bread by experimenting with mix-ins such as chopped nuts, dried fruit, or chocolate. They add texture and a delightful surprise with every bite.
6. Gentle Folding Technique: When incorporating mix-ins, use a spatula and adopt a gentle folding technique. Wide, slow strokes help evenly distribute the ingredients without overmixing, which could result in a dense loaf.
7. Sifter for Consistent Texture: Consider using the KitchenAid Sifter + Scale Attachment or any sifter when adding dry ingredients. This ensures a uniform texture by breaking up lumps in the flour.
8. Even Distribution in the Loaf Pan: Pour the batter into the prepared loaf pan evenly. This ensures consistent baking and a uniform rise, resulting in a visually appealing banana bread.
9. Optimal Baking Rack Placement: Place the loaf pan on the center rack of the oven. This helps the bread bake evenly from top to bottom, avoiding uneven cooking.
10. Toothpick Test for Doneness: Use the toothpick test to check for doneness. Insert a toothpick into the center of the banana bread; if it comes out clean or with a few moist crumbs (but no batter), the bread is ready to be taken out of the oven.
Store and Reheat
Storing:
Room Temperature: Store in an airtight container at room temperature for up to 2 days.
Refrigeration: For longer freshness, refrigerate wrapped in plastic wrap or in an airtight container for up to a week.
Freezing:
Slice and Freeze: Wrap individual slices tightly in plastic wrap, place in a freezer bag, and freeze for up to 3 months.
Reheating:
Microwave: Heat individual slices in 15-second intervals until warm.
Oven: Wrap slices in foil and reheat in a preheated oven at 350°F (175°C) for 10-15 minutes.
Toaster or Oven: Toast slices for a deliciously crisp exterior.
Tip: Allow refrigerated or frozen slices to come to room temperature before reheating for better texture and flavor.
FAQs on Kitchenaid Banana Bread Recipe
Here are some commonly asked questions and their short answers on this Kitchenaid Banana Bread Recipe
1. Can I make this Kitchenaid banana bread recipe without a KitchenAid stand mixer?
Absolutely! While a stand mixer can streamline the process, you can also use a hand mixer or mix by hand for equally delicious results.
2. What should I do if I don’t have a KitchenAid® Sifter + Scale Attachment?
If you don’t have the attachment, a regular sifter or a fine-mesh sieve will work to sift the dry ingredients for a smoother batter.
3. Can I use frozen bananas for this recipe?
Yes, you can. Thaw the frozen bananas, discard excess liquid, and use them as you would ripe bananas for a moist and flavorful banana bread.
4. How do I store the banana bread?
Store your banana bread in an airtight container at room temperature for up to 3 days, or refrigerate for a longer shelf life.
5. Can I substitute whole wheat flour for all-purpose flour?
Yes, you can substitute whole wheat flour for a healthier twist, but it may result in a denser texture. Consider using a mix of both flours for a balanced outcome.
6. What are some recommended mix-ins for added flavor?
Get creative! Consider adding chopped nuts, dried fruit, chocolate chips, or even a sprinkle of cinnamon for a personalized touch.
7. How ripe should the bananas be for Kitchenaid Banana Bread Recipe?
The riper, the better. Overripe bananas with brown spots will impart a sweeter flavor and moist texture to your banana bread.
8. Can I use a different pan size for Kitchenaid Banana Bread?
While it’s best to stick to the recommended loaf pan size, you can adjust the baking time if using a different-sized pan. Keep an eye on the bread and use the toothpick test for doneness.
9. Is it necessary to preheat the oven before baking?
Yes, preheating is crucial to ensure even baking and the right texture. Do not place the bread in a cold oven to avoid undesirable results.
10. Can I freeze the Kitchenaid Banana Bread?
Yes, you can freeze banana bread. Wrap it tightly in plastic wrap and place it in a freezer-safe bag. Thaw at room temperature before serving or reheat slices in a microwave or oven.
Feel free to share your experience with this recipe by trying it out. Don’t forget to drop a comment and provide your feedback on the blog for us to read.
Additionally, You can also like and, follow us on Pinterest, and Reddit for more updates. Your thoughts and engagement are greatly appreciated!


4 comments