
Indulge in the delightful sweetness of homemade strawberry ice cream with this easy-to-follow KitchenAid Strawberry Ice Cream recipe.
Combining the freshness of ripe strawberries with the creamy goodness of dairy, this dessert is sure to become a family favorite. Let’s dive into the steps and tools you need to create this luscious treat.
Check Some other popular recipe from KitchenAid
- KitchenAid Pizza Dough Recipe
- KitchenAid Cold Brew Coffee Recipe
- kitchenAid Chocolate Ice Cream Recipe
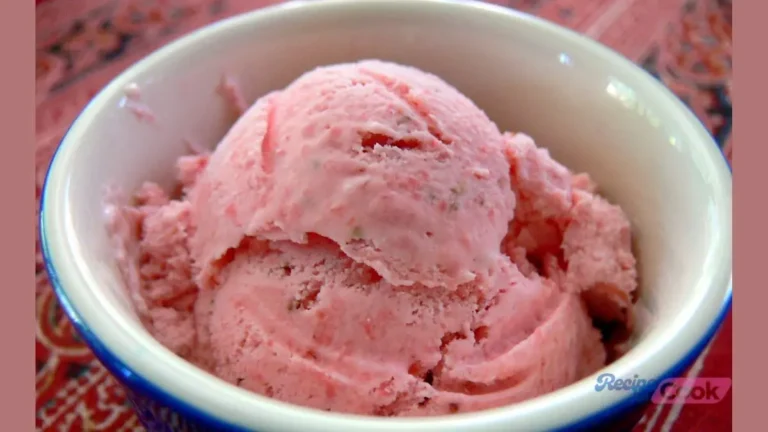
KitchenAid Strawberry Ice Cream: A Taste of Summer
Savor the essence of summer with our KitchenAid Strawberry Ice Cream. Fresh strawberries, tempered eggs, and quality vanilla create a perfect blend of sweet and creamy.
The KitchenAid attachment ensures a smooth churn. Serve with extra strawberries for a finishing touch. Enjoy this homemade delight, a celebration of seasonal flavors in every delightful scoop!
Ingredients Need for Kitchenaid Strawberry Ice Cream Recipe
- 1 pound fresh strawberries – hulled
- ½ cup granulated sugar
- 4 large egg yolks
- 1 cup granulated sugar – divided
- 1½ cups whole milk
- 1½ cups heavy cream
- 2 Tablespoons Watkins vanilla
How to Make Kitchenaid Strawberry Ice Cream
1. Prep Strawberries: Rinse the strawberries, hull, and slice them. Place in a mixing bowl and add ½ cup of sugar. Stir and let sit for an hour until juices form.
2. Puree Strawberries: Pour the strawberries and juices into a blender. Pulse until well pureed. Chill the puree in the refrigerator.

3. Temper Eggs: Combine egg yolks and ½ cup of sugar. Heat milk in a saucepan to 165 degrees (do not boil). Gradually pour hot milk into eggs, whisking constantly. Return mixture to the pan and heat to 165 degrees.
4. Add Remaining Ingredients: Pour the hot mixture into a bowl. Add remaining sugar, heavy cream, and vanilla extract. Whisk well.
5. Chill and Churn: Chill the ice cream mixture until cold. Add strawberry puree and whisk. Start your 2-quart ice cream maker (such as a KitchenAid Attachment) and pour in the chilled mixture. Let it churn until the ice cream sets (approximately 30-35 minutes).
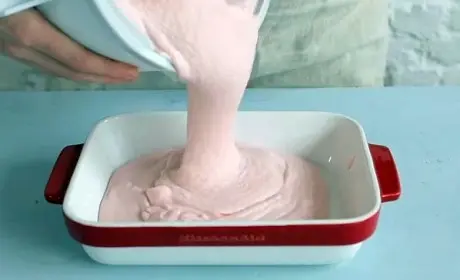
6. Freeze: Place the container in the freezer to set up further. Freeze for a couple of hours to firm up the ice cream.
Serve the ice cream with extra fresh strawberries if desired.
Some Tasty Ways To Customize This Ice Cream
1. Classic Sundae: Top a scoop with whipped cream, a drizzle of chocolate sauce, and a maraschino cherry for a timeless sundae.
2. Shortcake Bliss: Serve over freshly baked shortcakes, layering with strawberries for a delectable twist on a strawberry shortcake.
3. Waffle Cone Indulgence: Fill a crunchy waffle cone with scoops of strawberry ice cream for a handheld treat. Add sprinkles or chopped nuts for extra crunch.
4. Berry Parfait: Layer the ice cream with granola and fresh berries in a glass for an elegant and refreshing parfait.
5. Ice Cream Sandwich Extravaganza: Sandwich a scoop between two soft cookies for a delightful ice cream sandwich. Roll the edges in sprinkles for added fun.
6. Affogato Experience: Pour a shot of hot espresso over a scoop for a sophisticated affogato, balancing the richness of coffee with the sweetness of the ice cream.
7. Milkshake Marvel: Blend with milk for a luscious strawberry milkshake. Garnish with whipped cream and a strawberry on top.
8. Grilled Fruit Fusion: Pair with grilled pineapple or peaches for a warm and fruity contrast to the cold ice cream.
9. Elegant Berry Cups: Serve in chilled glass cups, alternating layers of strawberry ice cream with fresh berries for an elegant presentation.
10. Cheesecake Delight: Create a strawberry ice cream cheesecake by layering it over a graham cracker crust and freezing until set.

Enjoy these creative serving ideas to elevate your KitchenAid Strawberry Ice Cream experience. Whether it’s a casual family dessert or a special occasion treat, these suggestions add flair to the sweet indulgence!
Some tips on This Kitchenaid Strawberry Ice Cream Recipe
1. Freshness Matters: Use fresh, ripe strawberries for the best flavor. The sweetness of the strawberries will significantly impact the overall taste of the ice cream.
2. Perfectly Chilled Ingredients: Ensure that the strawberry puree and the ice cream mixture are adequately chilled before churning. This helps in achieving a smoother and creamier texture.
3. Sugar in Stages: Adding sugar in stages serves specific purposes in this recipe. It enhances the flavor of the strawberry puree, helps in tempering the eggs, and contributes to the final mixture’s sweetness. Follow the instructions to get the balance just right.
4. Temper Eggs Safely: To safely consume raw eggs, make sure to temper them properly. Alternatively, you can use pasteurized eggs for added safety.
5. Quality Vanilla Extract: Opt for a high-quality vanilla extract, like Watkins, to enhance the overall flavor profile of the ice cream. The vanilla adds a depth of flavor that complements the strawberries beautifully.
6. KitchenAid Attachment Prep: For KitchenAid ice cream maker attachment users, ensure that the bowl is adequately frozen (at least 15 hours). Running the mixer in advance and adding liquid while it’s running helps prevent freezing up.
7. Monitor Churning Time: Keep an eye on the churning process. The ice cream is ready when it starts to thicken and rise toward the top of the bowl, and the mixer may slow down slightly. Over-churning can result in a less creamy texture.
8. Initial Freezing: After churning, the ice cream will be soft. Allow it to set up further by placing the container in the freezer for a couple of hours before serving.
9. Customize with Toppings: Enhance the serving experience by adding extra fresh strawberries or other favorite toppings. This adds a delightful visual appeal and extra bursts of flavor.
10. Experiment with Flavors: Once you’ve mastered the base recipe, feel free to get creative! Add in chocolate chips, crushed cookies, or even a swirl of chocolate or caramel for a personalized touch.
By keeping these tips in mind, you’ll be well on your way to creating a batch of delicious KitchenAid Strawberry Ice Cream that will impress family and friends alike. Enjoy the sweet rewards of your homemade frozen treat!
How to Store Kitchenaid Strawberry Ice Cream properly?
To store KitchenAid Strawberry Ice Cream, transfer it to an airtight container and place it in the freezer. Ensure the container is tightly sealed to prevent ice crystals from forming.
For added protection, place a piece of plastic wrap directly on the surface of the ice cream before sealing the container.
Proper storage helps maintain the ice cream’s texture and flavor. Enjoy within a few weeks for the best quality.
FAQs on This Kitchenaid Strawberry Ice Cream Recipe
Here are some commonly asked questions and their short answers on Kitchenaid Strawberry Ice Cream Recipe
1. Can I use frozen strawberries instead of fresh ones?
Fresh strawberries are recommended for the best flavor, but you can use frozen ones if needed. Thaw and drain excess liquid before pureeing.
2. What if I don’t have a KitchenAid attachment?
Any 2-quart ice cream maker will work. Follow the manufacturer’s instructions for churning.
3. Can I use a different type of milk?
Whole milk provides richness, but you can experiment with other types. Avoid low-fat milk for creamier results.
4. How long does the ice cream need to churn?
Churning takes approximately 30-35 minutes. Watch for thickening and a slight slowing down of the mixer.
5. Can I substitute vanilla extract with vanilla bean?
Absolutely! Scraped vanilla bean seeds can add a delightful visual appeal and intense flavor.
6. Do I have to let the strawberries sit for an hour?
Allowing strawberries to sit with sugar helps draw out juices, intensifying their flavor. It’s recommended but not mandatory.
7. Can I skip tempering the eggs?
Tempering ensures safe consumption of raw eggs. If concerned, use pasteurized eggs or heat the custard further.
8. How long should I freeze the ice cream before serving?
Initial freezing for a couple of hours helps firm it up. Adjust based on your preferred consistency.
9. What if I don’t have an ice cream maker?
Without an ice cream maker, freeze the mixture in a shallow pan, stirring every 30 minutes until set.
10. Can I reduce the sugar for a lighter version?
You can adjust sugar to taste, but it contributes to the texture and sweetness, so moderate changes are recommended.
Indulging in the rich, homemade goodness of KitchenAid Strawberry Ice Cream is not just a culinary experience but a journey into the heart of summer’s finest flavors. The fusion of fresh strawberries, tempered eggs, and quality vanilla creates a symphony of sweet and creamy delight.
Whether enjoyed in a classic sundae, atop a shortcake, or as an elegant parfait, each scoop is a celebration of the season. With creative serving ideas and answers to common questions, this recipe invites you to savor the simplicity of crafting a dessert that captures the essence of sunny days.
So, gather your ingredients, embrace the art of churning, and relish in the sweet rewards of your homemade frozen masterpiece. Here’s to the joy of sharing and the timeless pleasure of a scoop of strawberry perfection!
Feel free to share your experience with this recipe by trying it out. Don’t forget to drop a comment and provide your feedback on the blog for us to read.
Additionally, You can also like and, follow us on Pinterest, and Reddit for more updates. Your thoughts and engagement are greatly appreciated!
7 comments